Iron on patches are cool decorations that stick to fabric when heated. They usually have fun designs or logos. When you put them on a backpack they make it look special and show off your style. Just heat them up with an iron and press them onto the backpack fabric to make them stay.
Want to jazz up your backpack with some awesome patches So learn How To Iron On Patches To A Backpack? It is super easy and fun. Follow our simple steps to customize your backpack and show off your unique style everywhere you go. Get ready to turn heads and make your backpack stand out from the crowd.
Heres a simple way to Iron On Patches To A Backpack. Start by picking out your favorite patches and placing them where you want on your backpack. Then heat up your iron and cover the patches with a cloth. Press the iron down firmly for about 30 seconds. Let it cool and voila. Your personalized backpack is ready to show off.
Understanding Iron on Patches
Understanding Iron on Patches is simple. They are patches you can attach to fabric using heat. These patches often have adhesive backing that activates with heat making them stick securely to clothing bags or other fabric items including a Busy Backpack.
With iron-on patches you can easily customize your belongings express your style and add a personal touch to your favorite items. Just follow the instructions provided with the patches and you are ready to go.
Preparation for Ironing on Patches
Getting ready to iron on patches is easy. First gather your patches and the garment you want to attach them to. Make sure your iron is clean and set to the appropriate heat setting for the fabric. Lay the garment flat on an ironing board and position the patches where you want them.
Double check their placement to ensure they are straight. Once everything is set you are ready to heat up the iron and start the process.
Step by Step Guide to Ironing on Patches
Prepare Your Materials
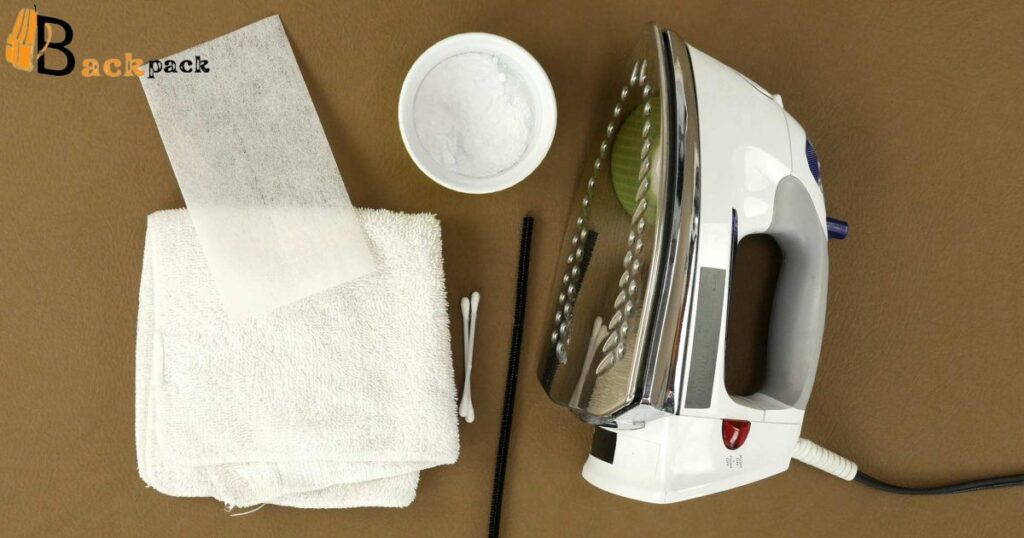
Gather your patches a fabric item to iron them onto (like a backpack or jacket) an iron and a thin cloth.
Position the Patches
Decide where you want to place your patches on the fabric. Arrange them to your liking ensuring they are evenly spaced and aligned.
Heat the Iron
Preheat your iron to the appropriate temperature for the fabric you are working with. Check the instructions on the patch package or the fabric item.
Iron On the Patches
Place a thin cloth over the patches to protect them and the fabric. Press the hot iron firmly on the cloth covered patches for about 15 to 20 seconds. Apply even pressure to ensure proper adhesion.
Apply Heat and Pressure
Applying heat and pressure is a simple process of using warmth and force together. When you apply heat and pressure to something. You are essentially pressing down while adding heat. This combination helps to bond materials together effectively.
Whether it is ironing on patches to a backpack or sealing two pieces of plastic applying heat and pressure ensures a strong and durable connection.
Let it Cool and Check
Allow the fabric to cool down completely before handling it. Once cooled gently lift the cloth to check if the patches have securely adhered. If not repeat the ironing process as needed.
Following these steps will help you successfully iron on patches to your favorite fabric items.
HOW TO PUT A PATCH ON A BACKPACK? THE ULTIMATE GUIDE!
Get ready to transform your backpack with our ultimate guide on How To Put a Patch on a Backpack First gather your favorite patches and decide where you want them to go. Clean the backpack surface with a damp cloth to ensure a smooth application. Next heat up your iron and place a thin cloth over the patches to protect them.
Press the iron firmly on each patch for about 30 seconds making sure they stick securely. Let the backpack cool then proudly display your personalized creation wherever you go. With our easy steps. You will be rocking a unique backpack in no time.
WANDERING HOW TO PUT A PATCH ON A BACKPACK?
If you are wandering how to put a patch on a backpack the process is simple and fun. First choose your favorite patch and decide where you want to place it on your backpack. Then heat up an iron and press the patch firmly onto the fabric.
Hold for a few seconds until it adheres securely. Finally let it cool and voila. You have added a personalized touch to your backpack in no time. Enjoy showcasing your unique style wherever you go.
HOW TO PUT A PATCH ON A BACKPACK WITHOUT SEWING?
Putting a patch on a backpack without sewing is simple and hassle free. You can use iron on patches or fabric glue to attach the patch securely. First position the patch where you want it on the backpack. Then follow the instructions on the iron on patch package or apply fabric glue to the back of the patch.
Press firmly to ensure it sticks well. Allow it to dry completely if using fabric glue. This method lets you personalize your backpack easily without needing any sewing skills.
IRON ON PATCHES
Iron on patches are trendy accessories that add flair to clothing and accessories. These patches come in various designs from cute animals to classic logos. To apply them simply heat the patch with an iron and press firmly onto the fabric.
They are a quick and easy way to personalize your belongings without sewing. Whether you want to spruce up a jacket bag or jeans iron on patches offer endless possibilities for expressing your style effortlessly.
BONDING PATCHES

Bonding patches are special adhesive materials used to repair or reinforce various items. They work by creating a strong bond between surfaces effectively sealing cracks or tears. These patches are versatile and can be used on fabrics plastics and other materials.
Whether you need to mend a torn backpack strap or fix a hole in your favorite jeans bonding patches provide a quick and reliable solution. Simply apply the patch to the damaged area and press firmly to activate the adhesive. With bonding patches you can extend the life of your belongings with ease.
HOW TO PUT A PATCH ON A BACKPACK BY SEWING
| Steps | Details |
| 1. Choose Your Patch | Select a patch that complements your backpack style. |
| 2. Position the Patch | Decide where you want the patch and pin it in place. |
| 3. Thread the Needle | Use a strong thread in a color that matches the patch. |
| 4. Start Sewing | Begin sewing from the inside, pulling the needle up. |
| 5. Stitch Around Edges | Sew along the patch edges for a secure attachment. |
| 6. Tie a Knot | Securely knot the thread on the inside once done. |
| 7. Trim Excess Thread | Cut any excess thread for a neat and tidy finish. |
| 8. Admire Your Work | Step back and enjoy your personalized backpack! |
This table provides a quick guide on How To Put A Patch On A Backpack By Sewing breaking down the process into clear and concise steps.
Frequently Asked Question
How do I prepare my backpack for iron-on patches?
Ensure your backpack is clean and wrinkle free. Iron the area where you will attach the patch for a smooth surface.
What temperature should I set my iron to when ironing on patches?
Set your iron to the recommended temperature for your backpacks fabric type.
Do I need special equipment to iron on patches?
No just an iron and a flat surface. Use a cloth or parchment paper to protect the patch and backpack.
How long does it take for the patch to adhere?
Typically a few seconds to a minute with even pressure.
Can I wash my backpack with iron-on patches?
Yes use a gentle cycle with cold water and avoid bleach or hot water.
Final Thought
To wrap it up mastering the art of ironing on patches to a backpack is a fantastic way to add your own flair and personality to your gear. With just a few simple steps and some creativity. You can turn a plain backpack into a unique expression of your style.
Whether you are covering up wear and tear or just want to make a statement this process is both fun and practical. So grab your patches and let your backpack reflect who you are in a fun and easy way.